Dreaming Of Spring

1.21.2014


I realize that it's only January but I am so over this winter.  It's dark and it's cold and all I want to do all day is sleep and eat bread.  Last year I at least had a trip to Hawaii to look forward to, but sadly this year we actually have to use our tax return a bit more responsibly.  Boo!  Hiss!

So what does one do when it's dark and cold and miserable outside?

Why, make summer dresses of course!  (Denial is a wonderful thing.)
 
Also a wonderful thing?  Making garments completely from your stash.


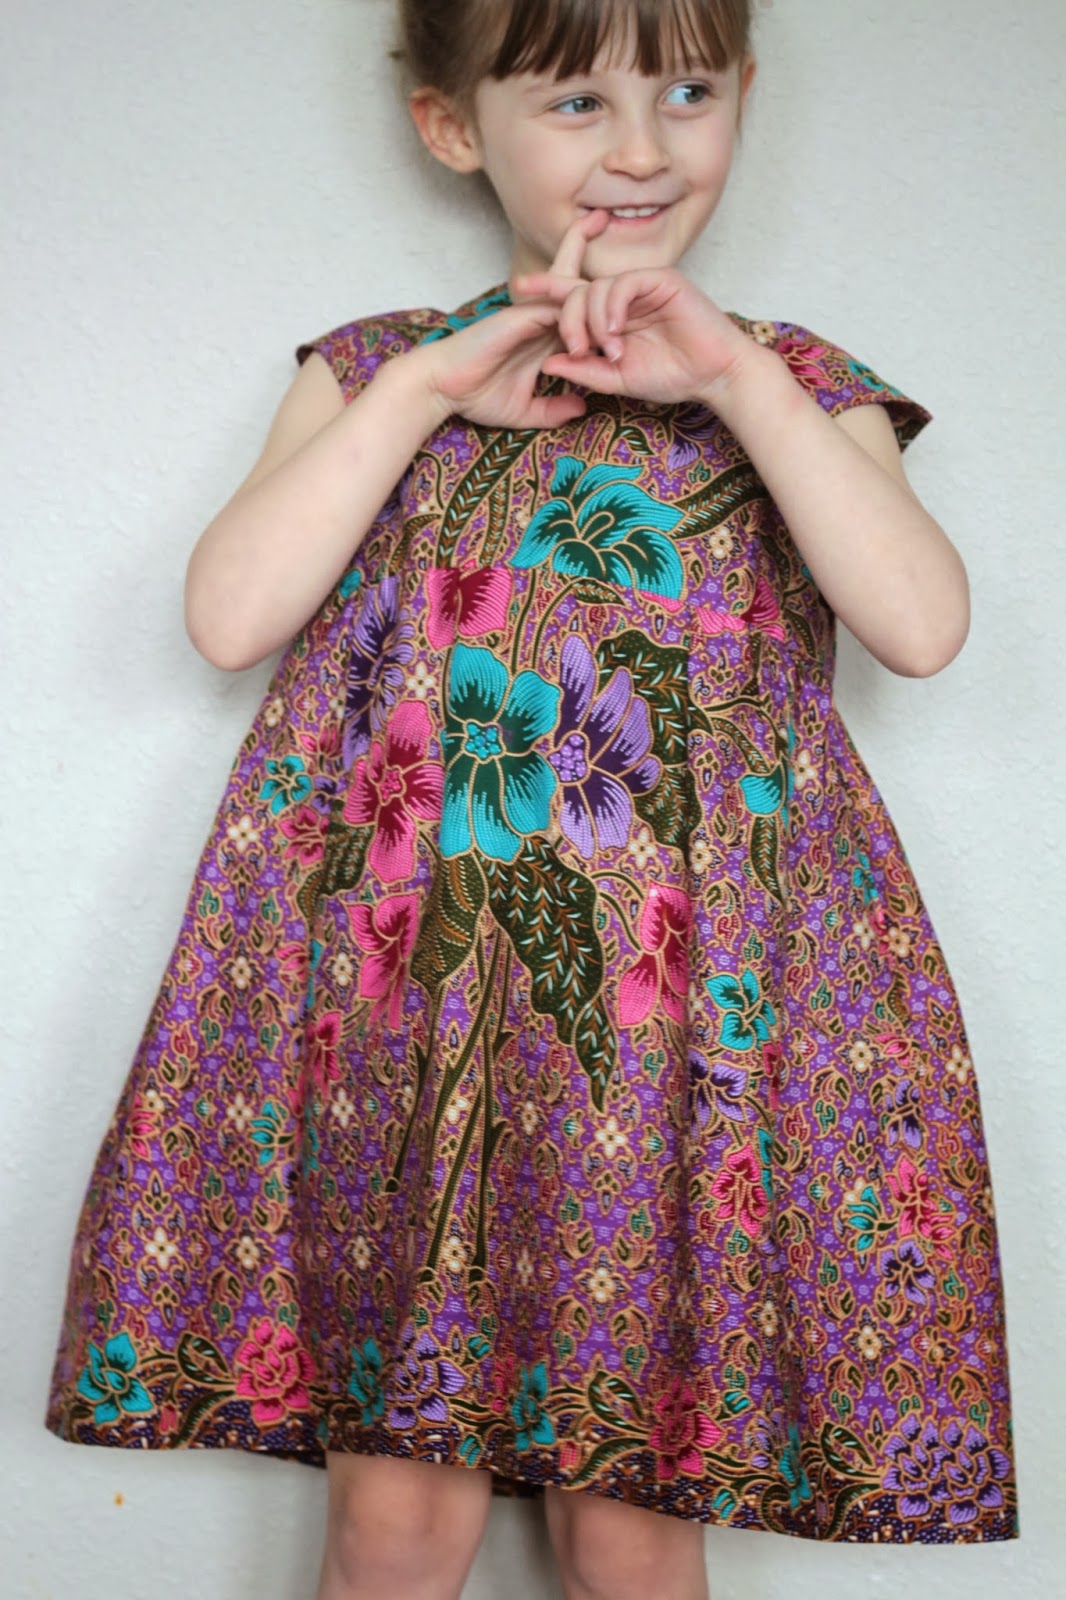
Like every other crafter out there I'm hoping to cut down on purchasing this year and use a lot of what I already own, starting with some of the beautiful fabric that's been gifted to me by some kind souls.  This fabric happens to come from Cambodia by way of my mother-in-law who's lived there for the last couple of years.  It's a cotton print fabric but the pattern was asymmetrical on the cut of fabric that I had so I spent a while trying to figure out exactly how I wanted to place the pattern pieces.  Honestly, after sewing up the dress I wish I would have placed the pieces a bit differently.  That blue flower on the front of the bodice kind of drives me crazy.  But that's just me being way overly picky, right?  I'll just make a point to stare at the back which is adorned with gold buttons.  Oooooh, fancy.


The dress is the Oliver and S Bubble Dress that has obviously be de-bubblefied (this just involved not including the lining or the step where you gather the bottom of the dress with elastic - a super-easy modification).  I opted to skip the decorative stitching around the "sleeves" since you can't see any stitching with this fabric and instead I just top-stitched around the armholes and the neckline.
As for the sizing, I chose to make a size 5 for my four and a half year old.   The size four probably would have fit her better right now, but considering that it's currently 35 degrees out I don't think that she'll be wearing this little dress outside anytime soon.


Now if you'll excuse me I'm off to eat an entire loaf of soda bread and to take a nap.  Wake me up when it's spring.

Pot Holders, Baby! Pot Holders!

1.09.2014


For the past year now I've been sewing monthly blocks as a part of Heal at do.  Good Stitches, a sewing circle that makes quilts for hospice patients and their families.  I have to say that when Nicke asked me to be a part of the circle I was very hesitant to join - not because I don't think it's an amazing idea (because I do), but because a quilter I am not.  Quilting is all about precision and accuracy and I operate in the world of "good enough" and "close enough."  I was truly worried that after about one month I would be kindly asked to remove myself from the Flickr group, but somehow after twelve months they're still  putting up with me.  And that in itself is a true testament to the kindness and grace of these women.

With the craziness of the holidays the group decided to take a little break from sewing blocks and participate in a sewing swap.  Can I confess that I'm a sewing swap virgin?  I've never participated in one and so I spent a lot of time brainstorming about what to sew for someone who no doubt has much greater skills than myself.  In the end, I settled on a potholders because

1) who doesn't need new potholders? and

2) it doesn't really matter if they're perfect because they're just going to get food all over them.

After trolling the internet for ideas, I ended up settling on this little one by Amy and it was absolutely lovely to sew except that it doesn't note what the seam allowance should be when you sew on the binding and so for my first potholder I used too large of a seam allowance making it so that I couldn't get my binding all the way over all those layers of Insulbrite (and there are A LOT of layers of Insulbrite).  That potholder is now the reject potholder that resides in my kitchen (score for me!).  On the other two I used a scant 3/8" seam allowance to sew on the binding and it worked perfectly.
As for the fabric I tried to mostly use what I had leftover from other projects, but the recipient happens to be a lover of the combination of orange and purple so I did run out and purchase some dark purple Luxe In Bloom purple fabric for the binding.

Hopefully she loves them.  And hopefully all those layers of Insulbrite do their job and she doesn't end up burning herself when using them - because maiming someone during your first sewing swap is probably a bad thing.

PS - One of the little chocolate sticking out is from Justin's... have you ever tried them?  They make some seriously delicious chocolate and peanut or almond goodies.  Seriously delicious.

The End Of A Career

1.06.2014


A couple years ago Ben decided that he wanted to try his hand at track bike racing, but after his third practice race he called me and told me that there had been a large crash and one of the rider's thumbs had been completely amputated in the crash.  And so I told him that I hope he enjoyed his short but illustrious track bike racing career because I like my men with both thumbs, thank you very much.  And that's how I feel about my attempts at sewing hats - that I've come to the end of my very short and (not so) illustrious career when it comes to sewing hats.


I was totally intrigued by the idea of making a little hat with Sew Liberated's Huck Finn Cap pattern.  I mean, how neat is it to create a fully shaped 3-D object from some flat fabric?  Unfortunately, I learned while making this little cap that my hat-making skills are subpar.  Actually, the whole thing went fine until I got to the very end where you attach the sweatband and then I had all sorts of trouble sewing through all the layers of the fabric and the thick bill.  I ripped it all out once in an attempt to get it just right but after a failed follow-up attempt I said "screw it."  It is what it is.


There are puckers where there are not supposed to be puckers and I never got around to tacking down the front of the hat to make it more of a "newsboy" style because I realized that my bill was sewn on slightly off-center (although, I actually kind of like this look just as much as the "newsboy" style).  And while the outside of the hat may look okay (if you don't look too closely) the inside is kind of a disaster.  Oh, and did I mention that I had to bribe my child with M&M's to get her to wear the hat so that I could take a picture?  And let's not forget what ended up happening with my first attempt at a sewn hat.


I think I'll be sticking with knit hats in the future.  Those seem to go a little better.